Cabinet Care and Maintenance
Cleaning, touch-ups, and general care.
Read More

Knowing how to adjust your kitchen cabinet hardware can help you prolong the life and beauty of your new cabinetry. CliqStudios cabinets are designed to be adjustable by the homeowner.
Each cabinet is built with several types of durable, high-performance hardware that will operate smoothly for years. Periodically, check your hardware to tighten hinge screws, realign drawers, and adjust drawer slides. Hardware can move and become loose over time.
Get Our Hardware Adjustment GuideHere are some signs that your cabinet hardware may need adjusting:
Maintenance will be needed more frequently for high-use doors and during seasonal temperature changes. Doors are typically made of hardwood, which is affected by the temperature and humidity levels. Your cabinets may require adjustments after installation as they become acclimated to the new environment.
Before you start cabinet installation, remove the cabinet doors to protect them from being scratched or dented. Then align your cabinet doors after the cabinet boxes have been installed. Start by looking at the information your CliqStudios designer has given you about the gap dimensions for your specific cabinets.
This will help you know exactly how much space is needed on each side of the door and face frame for everything to align. Once the doors are properly adjusted, it’s time to start installing decorative cabinet hardware.
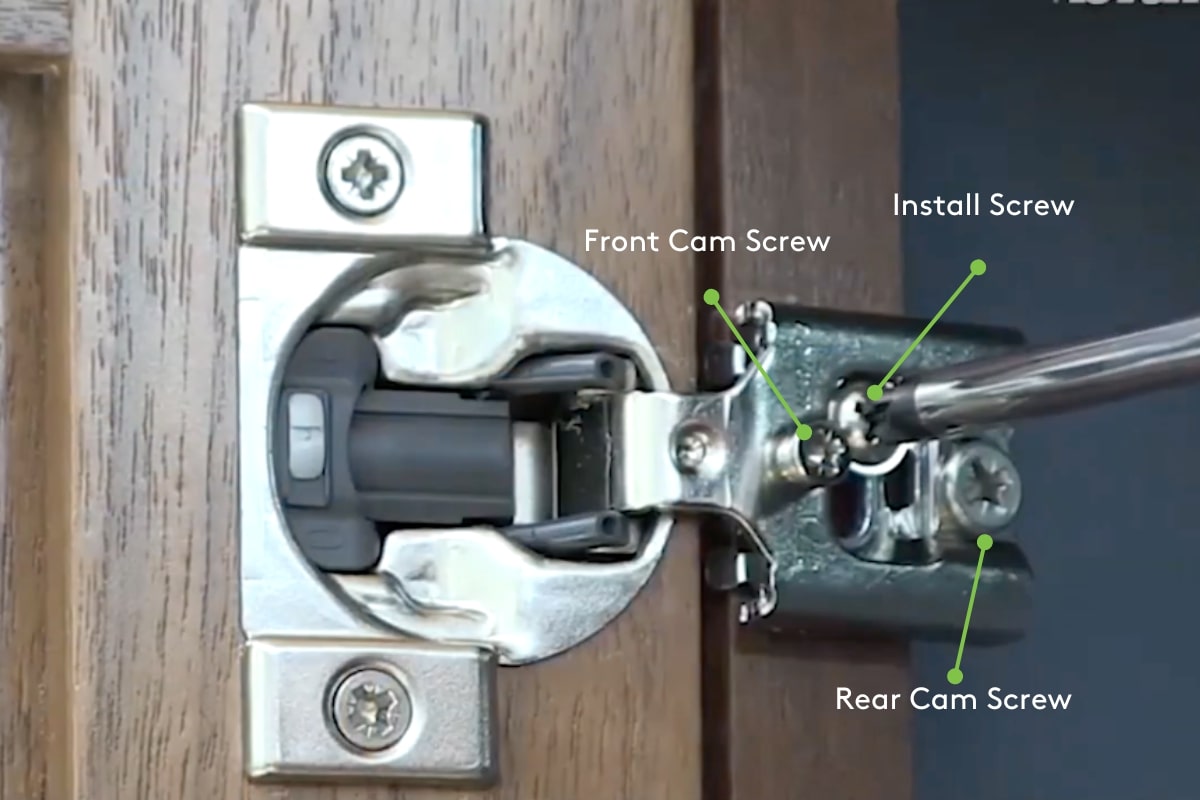
Cabinet door hinges have three adjustment screws: the cam screw, install screw and rear cam screw. The only tools and materials needed are a Phillips screwdriver. Here is how to adjust cabinet doors.

For more detailed descriptions of how to adjust cabinet door hinges, view our hardware adjustment guide.
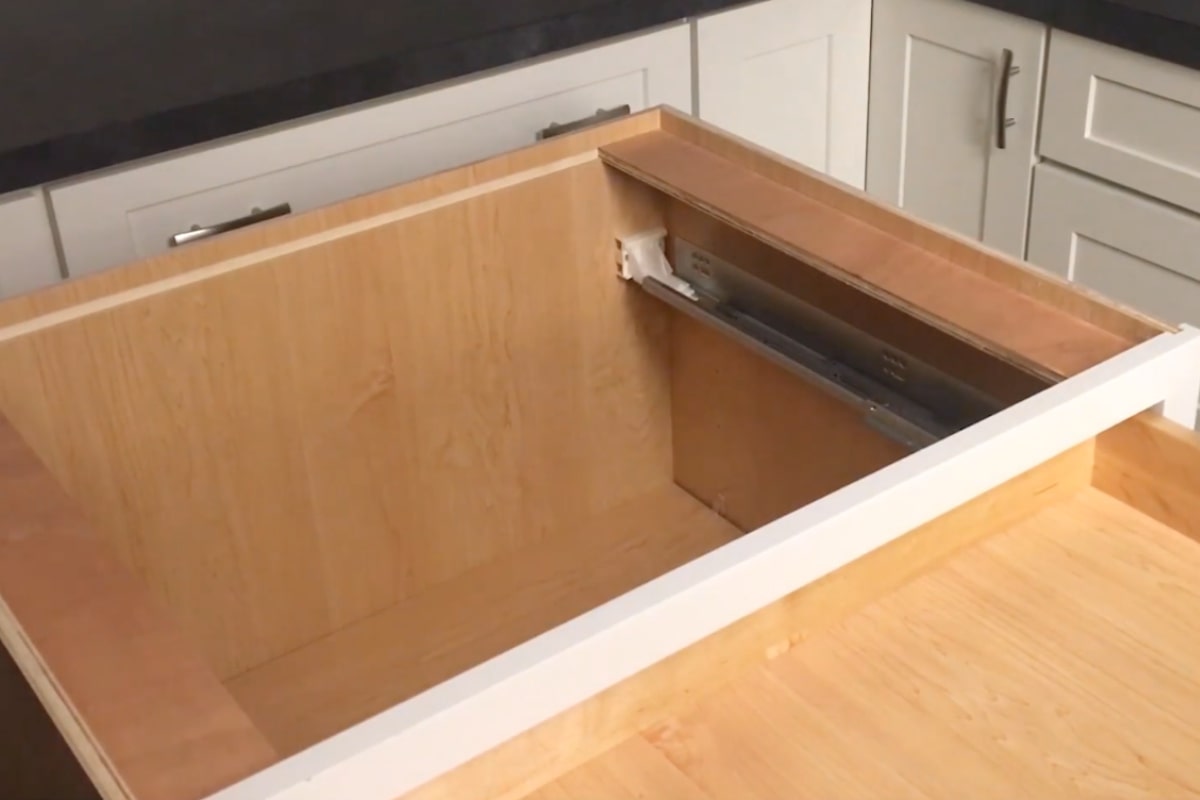
After cabinet delivery, it’s common for drawer boxes and glides to need realigning. Make it a point to inspect and realign drawer glides prior to installing your cabinets. To prevent scratches and damage, remove the drawers before installing the cabinets.
If you don’t know the gap reveal of your cabinets, talk to your CliqStudios designer. This information will help you know how much adjustment is needed to correct the glides and drawer box. After you have done your homework, it’s time to start the adjustment process.
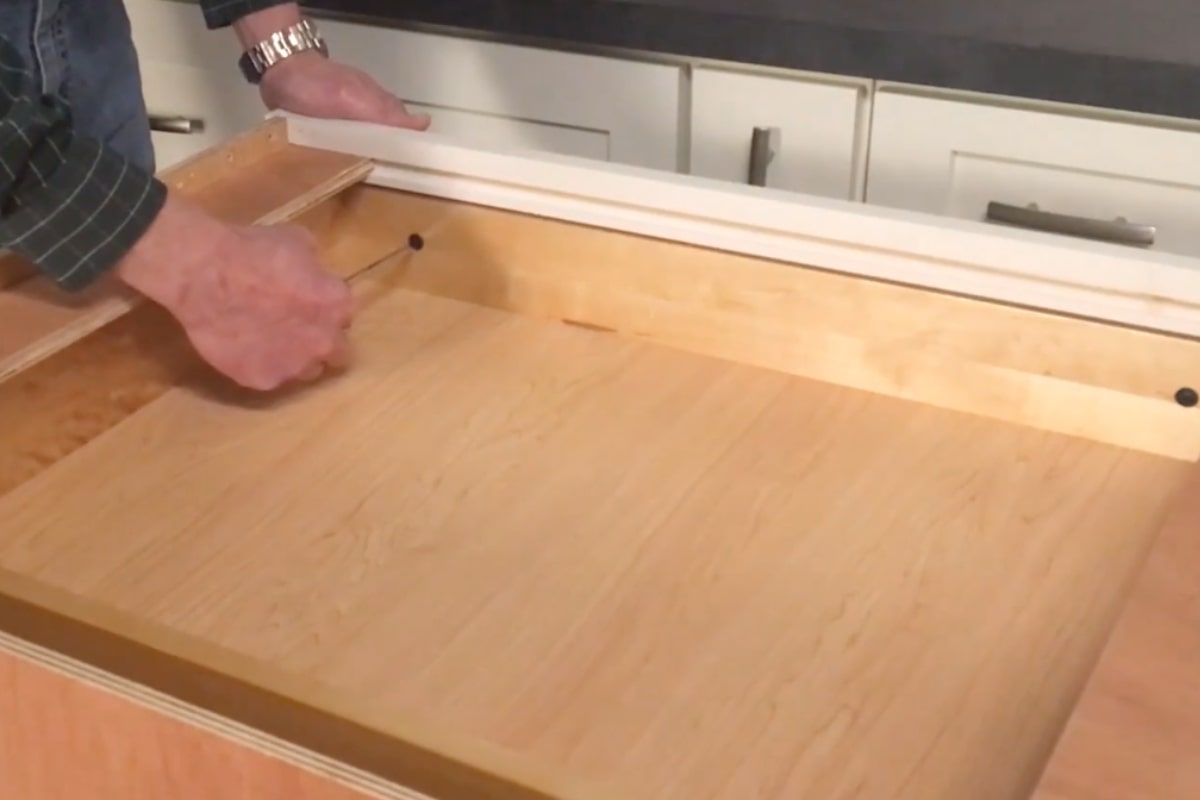
There are two types of adjustments for drawers: one for the drawer box and one for the drawer front. Depending on the issue, one or both might be necessary to make sure everything is functioning properly.
If the drawer is closed and crooked, it’s likely that the glides in the back of the cabinet are out of alignment, so please see the adjustment recommendations below. Sometimes drawer fronts can also be crooked, but this component can be independently adjusted in any direction. To fix this issue, here is how to adjust soft close drawers.


There are three main types of cabinet adjustments to pay attention to when you receive your cabinetry; Door hinge adjustment, drawer box alignment, and drawer front adjustment. Within each of these categories, there are multiple ways to realign and level out your cabinets. All of these adjustments can be completed simply by using a Phillips head screwdriver.
If you plan to adjust an entire kitchen of cabinets, give yourself enough time to become acquainted with the hardware and how everything works. First-timers will have a learning curve before it gets easier to understand what adjustments need to be made.
All that’s needed to adjust door hinges, drawer boxes and glides is a Phillips head screwdriver. CliqStudios cabinets have adjustable hinges and glides that make it easy to maintain and realign your cabinetry. Other than the screwdriver, if you are a first-time remodeler, you may need our cabinet hardware adjustment guide. This downloadable pdf provides detailed steps and images of what to look for when making your final adjustments.
Keep your cabinet hardware in great condition by regularly maintaining it. This includes checking your hinges and glides every 3 – 6 months. By regularly tightening and aligning the cabinet hardware, you will avoid wear and tear that could happen because of weight imbalances in your doors and drawers.
Another tip is to avoid overtightening screws. We all know that screws can get stripped if they are turned too far, so twist until they are secure then move on to the next hinge.
There are a few reasons to adjust cabinet doors and drawers. During shipment, cabinets and hardware can get shaken up causing the doors and drawers to be out of place. This means they are out of alignment and will need to be adjusted after the boxes are installed.
Another reason to adjust on a regular basis is because of temperature changes. Wood products naturally react to heat, humidity and cold. Expansion and contraction are common ways that wood adjusts to these changes which means doors and drawers might get misaligned in the process. Explore our cabinet hardware adjustment guide for guidance on adjusting your cabinet hardware.
The only tool necessary for cabinet adjustment is a Phillips screwdriver and a little elbow grease. All CliqStudios cabinet door hinges and drawer glides are made to make your life easier. Simply follow our step-by-step instructions for adjusting and aligning, watch our videos or download our hardware adjustment guide. If you are having difficulty, please contact the CliqStudios Customer Service team at (888)350-1242 or email us at customerservice@cliqstudios.com.
All that’s needed are a few adjustments. Door hinges have three adjustment screws: the cam screw, install screw and rear cam screw. Find a Phillips screwdriver and start adjusting the screws left and right to properly re-align your cabinet doors.
To adjust your door to the left or right, turn the front cam screw. To adjust your door up or down, turn the install screw. And lastly, to move your door in or out, turn the rear cam screw. For more detailed instructions, view our hardware adjustment guide.
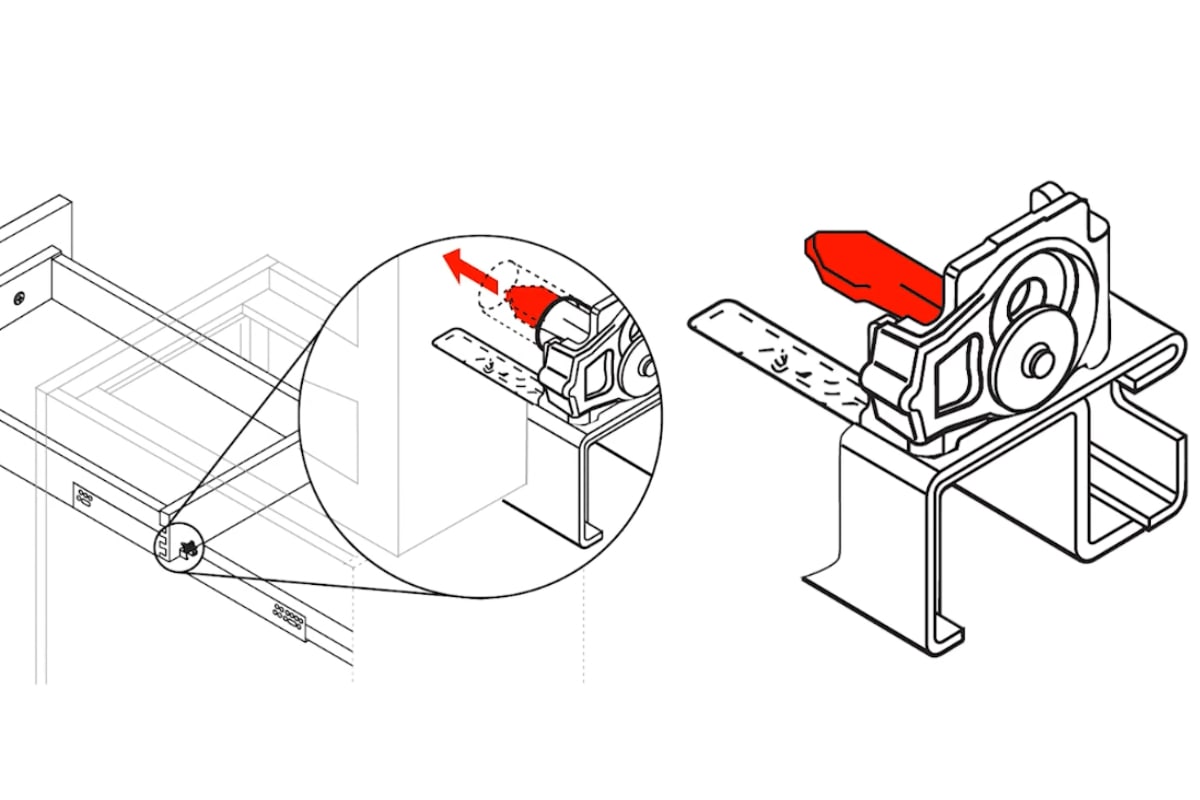
Typically, this is a problem with how the drawer glides attached to the front of your drawer box. Look carefully at both the left and right sides to make sure the glide slides all the way into the teeth of the attached hardware.
Once this piece is pushed all the way in, your glides will move smoothly. If this does not fix the problem, it may be related to drawer glide alignment. Please see our detailed hardware adjustment guide for step-by-step instructions.
All that’s needed are a few adjustments. Start by turning off one of the soft close hinge mechanisms on each door. If that doesn’t solve the problem, try the following solutions.
Door hinges have three adjustment screws: the cam screw, install screw and rear cam screw. Find a Phillips screwdriver and start adjusting the screws left and right to properly re-align your cabinet doors.
To adjust your door to the left or right, turn the front cam screw. To adjust your door up or down, turn the install screw. And lastly, to move your door in or out, turn the rear cam screw. For more detailed instructions, view our hardware adjustment guide.
Cabinet hardware does not need frequent maintenance, but it’s good to check every 3 – 6 months. Take a look at all the screws to make sure they are tight, and if necessary, use a Phillips screwdriver to tighten any loose screws. Do a visual inspection of door and drawer alignment as well.
If you own inset cabinets, you may notice these adjustments are needed more often as the weather changes. This will be obvious because the expansion or contraction could cause your drawers or doors to scrape the cabinet frame.
Adjust these cabinets as soon as possible to prevent scratching or damage. Overall, check the most heavily used cabinets more frequently to prevent issues and maintain a beautiful new kitchen.
Yes, CliqStudios will help you with cabinet adjustments. That is why we have created a cabinet hardware adjustment guide, YouTube videos and articles on how to make proper adjustments. All these resources go into great depth on how to adjust and align your new cabinets, but if you are having issues, please get in touch with CliqStudios Customer Service for help.